DIY Holiday Yarn Topiaries
Supplies:
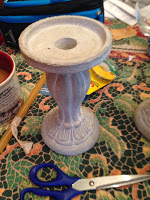
two floral bases, pedestals or small pots
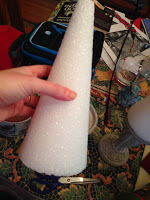
two Styrofoam cones, about 10 to 12 inches high (in the floral section of a craft shop)
hot glue gun or Aleen’s Felt or Fabric glue
A skein of yard, green, red or white
scissors
3-4 felt squares in various Christmas colors
2 feet of decorative Christmas ribbon, optional
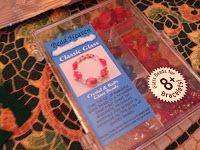
small decorative beads
silk floral leaves
Directions:
Step 1: Get your flowers leaves and buds all finished, that way the gluing with a hot glue gun will go quickly. Remember, you need to have two of everything if you are making two topiaries to decorate an entryway table, buffet for a mantle. Also keep in mind, from a design perspective, you want the topiaries near each other so thin about how they look together. Because I am going to make my flowers along one side going up the other, I decided to have a mirror image on the other topiary. If you wish to simplify yours, make your design more centrally focused, and then they should look good next to each other.
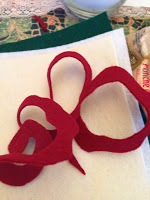
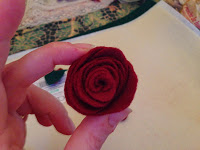
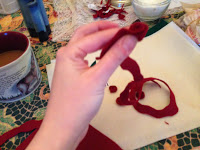
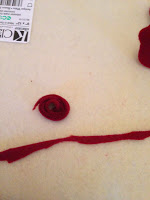
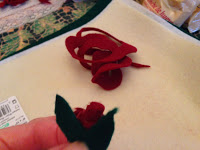
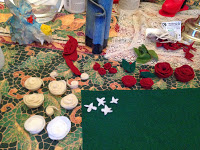
Create your main flowers by first cutting out of the felt squares. Cuts in a wavy circle about 4 to 5 inches in diameter. Remember you need two of everything. With the wavy circle, start on the outside and cut a long, wavy spiral towards the middle, making a strip from the outside moving towards the center. What you’ll have is a long felt coil. Then, starting at the endpoint, wrap the felt around itself tightly and continue wrapping it around itself going outward. You’ll find that as you go outward, the felt is less tightly wrapped. The petals become a little looser creating a flower shape. Glue the endpoint down and set aside. Continue making as many flowers as you want of these main flowers. Vary the shape from 4 to 5 inches down to perhaps three.
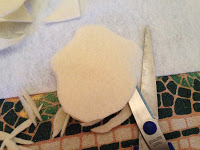
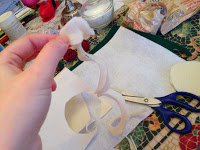
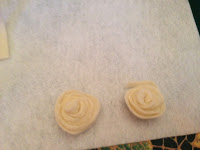
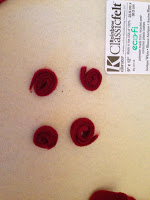
 .
.  .
. 
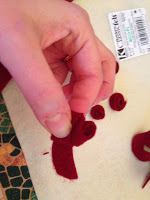
Step two: Create accent flowers. These are smaller and simpler shapes. We’re creating small buds for your flower design. This is very easy to do and you can create simple spiral circles out of the felt scraps you have leftover from your main flowers. Simply wrap the felt strip around itself to create a circular coil. Set them down, and the felt should actually hold itself together without glue until you glue it down onto the topiary.
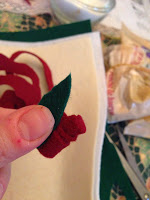
Another bud you can create is by using the same technique you used for your main flowers, but not going as far as a full-blown open flower petal. Start by creating a wavy strip about 2 inches long. At one end start wrapping the felt around itself but not evenly, wrap the felt unevenly creating a bud that’s about to open. Do this 2 to 3 times, moving down the bud, then glue the endpoint together. You may need to cut any access felt off. Now cut leaf shapes out of green felt, and glue over the bud. Now it looks like a flower about to bud open. Create a couple of these and set aside.
Finally, you can also create simple flat flower shapes by cutting felt flat with 4 to 5 petals, almost looking like a snowflake. Create a handful of these as well.
 .
. 
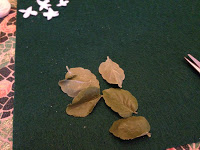
Step three: Create leaves by cutting leaf shapes from your green felt, in various sizes. Also, if you have them, you can cut off silk leaves from their plastic stems so they can easily be glued down, too. I like the look of the silk leaves, personally.
Now you should have all of your embellishments ready to go.
 .
.  .
. 
 .
. 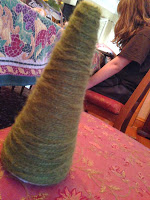
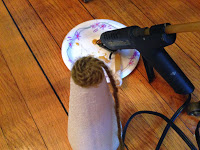
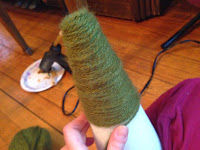
Step four: Create your tree. Using your glue gun or felt glue, glue the top of your Styrofoam cone. Take the end of your yarn and start covering the top of the cone in a circular coil, gently pressing down the felt as you go. This is your starting point and from now till the very end of your cone, you continue to wrap the yarn around and down completely covering it. Circle it around as evenly as possible. When you get the bottom of the cone, glue down the yarn and cut it. Continue with the other cone. Next hot glue the covered cone to your base and do the same with the other. Now you’re ready to glue the embellishments on.
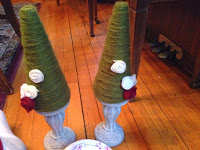
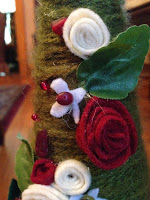
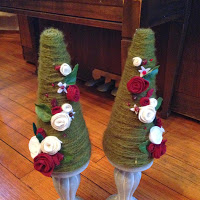
Step five: Begin with your main flowers and glue them on. I started in one corner, creating a central focus of flowers, and then lessened them visually as the “grew” towards the top. Working outward and up, glue the smaller flower and buds. Add accent leaves, and finally add beads strategically around as light accents. I also added a bead in the middle of the small, flat petal flowers to give them a “middle” and make them less boring.
Step six: This step is optional. But I added a decorative bow using some sparkly Christmas ribbon on the bottom of my base. It made it look more formal and festive. My daughter voted no ribbon. My husband voted with ribbon. It’s up to you, depending on what your base is and how decorative you go with your topiaries.
Enjoy! And be careful with that hot glue gun. I gave myself three burns making these!
Latest posts by Flora Caputo (see all)
- Sugar-Free, Low-Carb, Olive Oil Chocolate Hazelnut Tart - February 18, 2023
- Easy Slow Cooker French Onion Soup - November 28, 2022
- Recipe: Chicken Vindaloo with Whole Foods Vindaloo Curry Powder - January 22, 2022

