Around last Halloween, my daughter’s teacher sent a note home saying that for the class Halloween party, the kids had to bring “gross cuisine”. The children were supposed to find a recipe online to create their “gross” concoction. My daughter and her partner in class decided that we were going to make RATS, EDIBLE RATS. She had found a recipe online that included creating rat “molds” out of tinfoil and putting cake batter in them to bake. When I saw this recipe, and was expected to help her make it, I was skeptical that it was going to work. I didn’t believe the tinfoil could hold the weight of cake batter while baking.
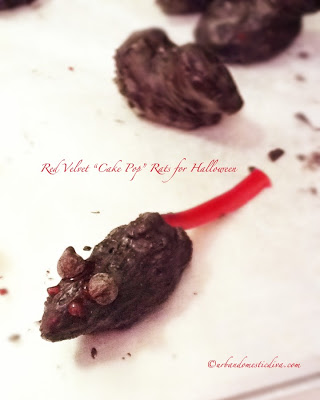
I decided to use a cake pop mixture, which is very pliable and can be shaped into anything if you put your mind-and hands-to it. I thought Red velvet cake pops would create many rats, dark brown on the outside and fleshy red on the inside!
The kids and teachers were thrilled with the finished product. They talked about them long after Halloween.
I would suggest if you want to make them even grosser, fill them with a raspberry jelly as you form the rat shape. So when the child bites into the rat, yummy red OOOZE comes out of it!
Wha ha ha ha ha! (That’s my evil mom laugh, fyi.)
Step 1:
Make cake pop mix. Make a red velvet box cake bake it into a 13 x 9 pan. Crumble the cake finely with your hands once cooled. Knead up to one can of cream cheese vanilla frosting into the cake crumbs. I usually don’t use the whole can, because I think it’s too sweet with all of it. I usually use about a half to three quarters of the can of the frosting. Just enough so the mixture is pliable and can be shaped into anything. Chill for 15-20 minutes, covered.
Step 2:
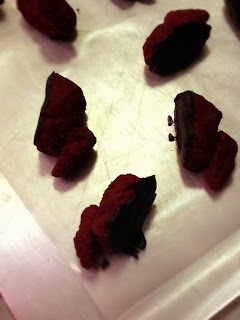
Next, shape the body of the rats by creating almost an rectangular-egg shape with a flat bottom. Then make their little heads by making a smaller egg shape but more pointy, almost like a triangle with a rounded top. Press the head onto the body. Feel free to use some frosting at the base of the head in order to make the two pieces stick to together, however I had no problem because there’s enough moisture in the cake pop mix. Let the rats chill in the refrigerator for 20-30 minutes, and keep them cold as you work on covering a handful at a time.
Step 3:
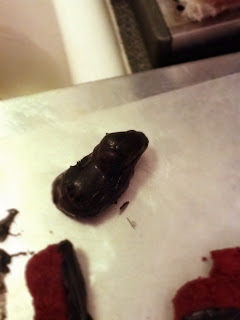
Meanwhile melt candy melts according to package directions in a bowl. I used chocolate candy bark for these, but you can use White candy melts with black food coloring to make the rats a Gray-Black color to make them spookier. You can also use chocolate candy melts alone or together with light Brown candy melts and a candy brush to get very detailed with fur if you like. As my daughter informed me of this project the night before it was due (sound familiar?) I kept things simple.
Step 4:
Dip or brush the bottoms of the rats with the melted candy and set them on their side to cool on parchment paper. This allows the bottoms to get set-up first. Once bottoms are cool, dip and or brush melted candy along the tops of the rats.
Step 5:
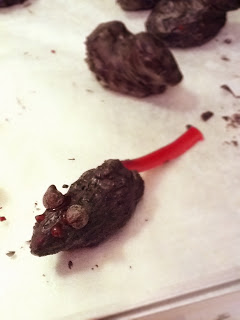
While the heads are still slightly wet, place 2 chocolate chip morsels as ears on the rats’ heads. You can use the red cake writing gel to adhere the chocolate chips if the candy melt has hardened. For the ears, you can also use sliced almonds cut in half if you wish. Also while still wet, adhere their tails. You can use sliced up licorice, Fruit by the Foot or thin licorice rope.
Step 6:
Once rats are completely set, take red cake writing gel and add eyes to the rats.
You’re all set! Watch the kids giggle and screech when they bite into the rats and see the rich red velvet flesh that they’re eating!
Happy Halloween prep!
- Sugar-Free, Low-Carb, Olive Oil Chocolate Hazelnut Tart - February 18, 2023
- Easy Slow Cooker French Onion Soup - November 28, 2022
- Recipe: Chicken Vindaloo with Whole Foods Vindaloo Curry Powder - January 22, 2022

