
My daughter has become obsessed with dragons, preferably Asian ones-but she will take any as long as its big, fierce with lots of teeth and scales. Recently, she had to do a book project in which they had to create a bag for the book, and put items in it that relate to the story. We were talking about what her plan was going to be, and of course her book had to do with a white mountain dragon. I laughingly said, “Wouldn’t it be fun if the sack looked like a dragon’s mouth and it looked like it was eating your hand as you pulled items out to share with the class?” Of course, I should learn from my day job in advertising, never mention anything you don’t plan on executing. SO my daughter’s eyes lit up and 10 minutes later she and I had a sketch for our “Dragon Bag”. It would involve simple sewing, ribbon, notions and some remnant fabric. But in the end, she had a bag she could keep to store other stuff and of course, her teacher loved it.
I am sharing it on the blog because, though our execution was a little rudimentary (my daughter did have to do most of the work-it was her project), I think if a true crafter did a tidier version of this, it would make a pretty nifty gift for a dragon lover anywhere. You could use silks and velvets for an Asian dragon, or fake furs for a furry dragon. You could make different animals with teeth-a fox or alligator? It took a couple hours plus a trip to the craft store, a voila! A sack that could eat anyone’s arm off in style.
To follow our dragon sack you will need:
1-2 yards, depending on the size of your bag, of the outer fabric of the dragon. I got mine in the remnant bin.
Same amount of red fabric for the inside of the cinch sack, to look like a mouth
1 square of white felt for teeth and eyes
1 square of stiff glitter felt for the back scales
3-4 yards of “scales”, I used tassle fringe trim, but you can get tulle trim, sew felt “scale” shapes in a row to a thin ribbon as “trim”, strips of fur or even textured lace
black sharpie
two jewels for eyes
1/2 yard ribbon for the closure-or whatever you bag needs to have enough to cinch close and open


Cut your outer fabric a little bigger than the finished size you want. I wanted mine to be roughly 14″ long, so I cut a rectangle of about 15-16″. Measure and cut your red fabric the same size.
Use fabric glue or sew the “scales”, starting at the bottom of the right side of your outer fabric, overlapping slightly as you go. Leave an open area near the top for eyes and nose, if you wish. Do the same for the other side.
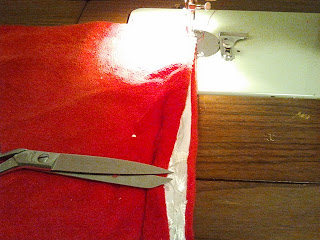
Sew the red fabric to both pieces of the outer fabric with the scales on, right sides together, as if you were sewing a pillow. For each “side”, sew all edges except the one at the top. Turn them inside out.
Now, right side together again with white/red pieces, sew all edges except the top.
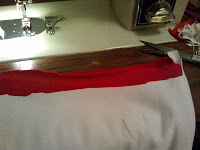



Roll down the top about 3/4″ so you make an area to thread your ribbon, and cut away a white strip so you see a red edge from the outside. Now sew along the bottom of the fold edges on both sides, leaving an open area near the edges so you can thread the ribbon through.
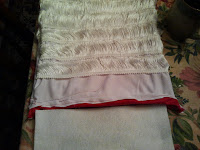
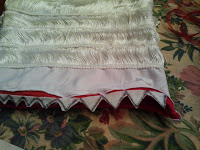
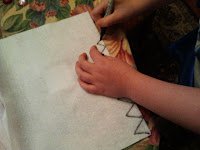

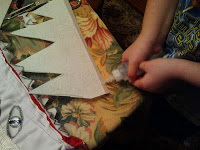
Turn inside out. Now cut your teeth by measuring the length of your felt and the bag, and sketching out your teeth shapes. Cut and use fabric glue to adhere the teeth to the red edge of the mouth. Do the top and bottom. Let dry for 10 minutes. Use a safety pin and pin the edge of your ribbon. This is your “handle” as you thread the ribbon through the top of the bag. Scoot the ribbon through the inside of the seam, pushing the pin through until you get to the side you started at. Pull it out, take off the safety pin, cut access and tie a knot.

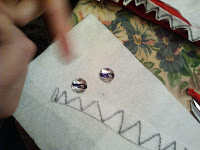
Using your marker, cut an almond shape for the eyes, cut and glue. Use a marker to draw irises on the jewels, and glue to the felt shapes in the middle. Let dry.
Cut a large scale shape with triangles from the stiffer felt that will go down the center of the front of the bag. Fold a crease along it about 1/4″. This will help to glue and adhere the scales to the bag. Let dry a few minutes.


There! You have your fierce dragon cinch sack!
- Sugar-Free, Low-Carb, Olive Oil Chocolate Hazelnut Tart - February 18, 2023
- Easy Slow Cooker French Onion Soup - November 28, 2022
- Recipe: Chicken Vindaloo with Whole Foods Vindaloo Curry Powder - January 22, 2022


