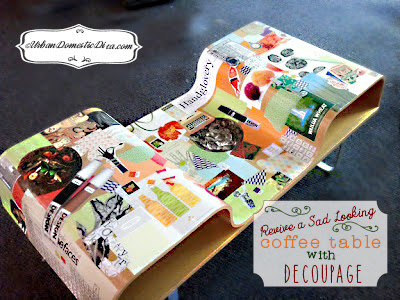
Now I know we all have some pieces of furniture from our dorm room days, or “beer run” days, that in some ways we still need to furnish our nests with. Budgets these days can’t allow for a furniture shopping spree for most of us. Thus that eyesore of a coffee table or end table irks you daily like nails on a chalkboard. But fear not! We have all seen some Trading Spaces. It’s amazing what you can do with a bottle of glue and a little design sense!
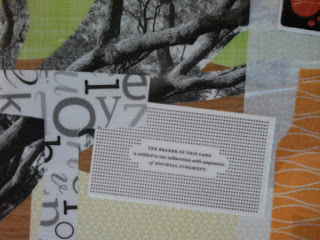
In the past, I have revived some old pieces of furniture by gluing paint chips from the hardware store, in a mosaic fashion on the wood, then varnishing it. At first, the effect was cool and colorful. The problem, however, is over time the varnish yellows and gets a funky texture to it. Recently, I have been doing some decoupage work with my girl scout troop, and have been using some beautiful paper from books found in the scrapbooking section at the craft store. So when a group of us at work decided a certain cracked and ugly coffee table needed to get tossed, I wondered if I could breath new, creative life into it through decoupage. I have to say, the process was fun and easy, and everyone is really happy with the results (see above).
One important thought about decoupaging furniture that I have found. You need a unifying “theme’. That theme can be a color palette, a story theme, an art style, a type of paper, etc. But because decoupage is a mix of things layered on top of each other, it can look either beautiful and interesting, or a chaotic circus that doesn’t match anything in the room. SO have a plan, and then start collecting your items to glue down. Our theme was lightly based on the design industry, and more importantly, we kept to a color palette of orange, green, black, purple and baby blue. We grabbed paper pieces from everywhere, being fortunate to have a lot at our fingertips from being in the visual arts industry.
And by the way, if you need other ideas for inexpensive DIY ideas for a coffee table, check out this comprehensive post by our friends at homeesthetics.net!
Here is a list of ideas on where to get material for your decoupage.
Vintage, old or new magazines
Vintage, old or new book pages
Printouts, black and white or color, of images off the web, which can be anything. Use stock image sites or Pinterest for ideas and patterns to print off
Paper from the craft store
Paint sample chips
Pantone chips
Victorian clip art from books
Old greeting cards
Music CD covers or color copies of record album covers
Board game pieces
Origami paper
Commercial paper sample booklets
Stationary, invitations, postcards, business cards
Old commercial artists/photographer rep books (like Workbook or Blackbook)
Old cookbooks
Old or new photographs
Wrapping paper
Maps, old or new, travel brochures or books, atlases
Drawings
Posters
You get the picture!
Other supplies you will need:
white glue, such a Elmer’s
plastic cup and paint brush
scissors
burnisher (or the edge of a popsicle stick will do)
decoupage sealant and glaze, such as ModPodge
sponge brush
clear acrylic spray varnish for finishing acrylic paintings
And then you go!
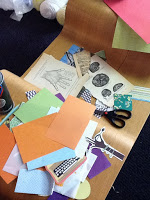
Lay out your pieces roughly on your furniture so you have a sense of where you want to put things. I work with my bottom layer with bigger pieces first and then layer over as I work. This is the chance to see if you have enough paper or if you need more. Remember where you want to put things, grouping paper in sections on the floor where you are working so you don’t get too messed up. Then clear your surface, and make sure it is clean and dry.
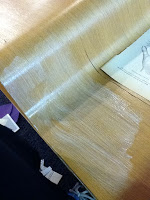
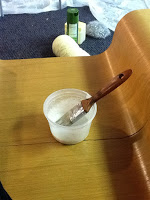
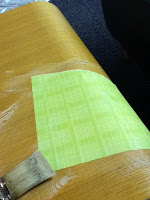
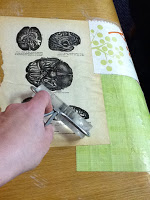
Mix 3 parts Elmer’s glue with one part water. You should then have slightly diluted glue. The glue will stiffen up as it sits out so make sure you have extra water on hand to add a little as you go. The glue should be brushable, but not too watery. Too watery and your paper will bubble and warp too much. Brush down an area you plan on starting with and layer a few of your paper pieces down. Burnish it down with the edge of a popsicle stick or a roller trying to push any air bubbles out and keep things very flat to the surface. Brush a thin layer of glue on top of the paper and over the furniture surface, working from the center outward. Now continue with other pieces. Add thin layers of glue on top of the paper that you wish to overlay other pieces on. Keep going until all your pieces are glued down and you feel happy with the composition.
Instead of Elmer’s glue, you can also use the decoupage glazing and sealant in this manner. However, it is a little expensive. I prefer to use it only as a sealant on top in layers, and use cheaper glue to get everything down. I am not sure there is much of a difference, but if there is, someone please comment!
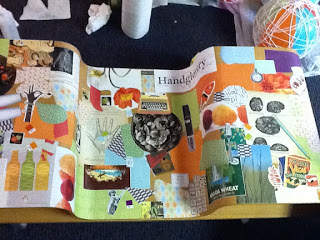
Now at this point, I let the furniture sit overnight. One, to let things set and cure. And two, to let my creative brain sleep on it. I move so fast when I work, and sometimes a night’s sleep brings clarity to your art. You can look at things fresh and maybe see areas you want to add more to or change. Changing can be hard because you can’t really pull things up. You can add over areas to change things, however.
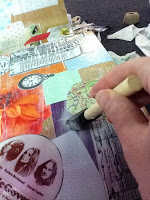
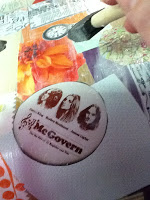
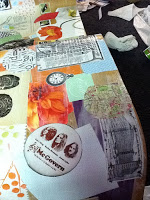
Now using your sponge brush, brush thin layers of decoupage glazing over the furniture in long, even strokes. It dries quickly, so don’t go over areas you just brushed down that are drying, or you will get streaking textures in the glaze. I liked Matte glaze for my piece, but there is Gloss as well if you want things shinier. After your first coat, let it sit for 20 min. Then do another coat, and another. The bottle said between 3-5 coats. I layered 5 coats on my table. I wanted to make sure if someone spilled something on it, it was somewhat water resistant.
After the 5th coat, I spayed a thin layer of clear acrylic, matte finishing varnish used for acrylic paintings over the table as a final sealant. Let it dry for another 20 minutes.
And voila! Jenky cracked Ikea table is now a pretty, hip table with an homage to the office color palette and to the advertising/design industry. I bet your piece will go from eyesore to a creative focal point in your room!

- Sugar-Free, Low-Carb, Olive Oil Chocolate Hazelnut Tart - February 18, 2023
- Easy Slow Cooker French Onion Soup - November 28, 2022
- Recipe: Chicken Vindaloo with Whole Foods Vindaloo Curry Powder - January 22, 2022
