I read an old Jerry Baker book from the library recently, where he explained a simple way to compost leaves through the Winter months. Rather than tossing extra raked leaves in the garbage, using it towards good compost come Spring sounded perfect. So we gave it a try today. I’ll walk you through how we did it, and I will post a “Part 2” come Spring, and we’ll see what we got!
The theory is that an aerated black bag slowly decomposes material over the long winter months. Seems like it would work, right? You mix in the raked dead leaves with some green material (grass clippings or clipped leaves) and tie it off. Keep it in a sunny spot but somewhere out of sight. Every few weeks, give the bags a shake. Come spring, you have black gold.
Low effort compost? Count me in.

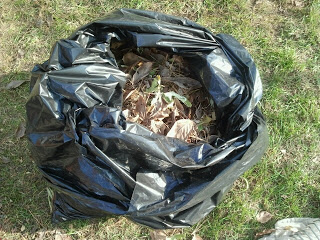
Step 1: Get a large black plastic bag.
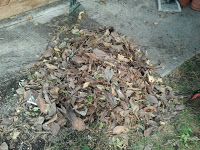

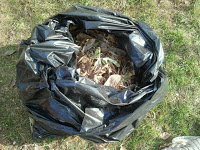
Step 2: Fill it with raked leaves as well as green leaves, clippings and grass. I put in 2/3 brown and about 1/3 green material. Fill the bag only 2/3 full so you can shake the material around over the next 6 months.
Step 3: Add a shovel full or two of dirt.
Step 4: Mist the material with water. Shake it around. Add more water on “mist” mode. The material should be lightly moist but not soggy-like a wrung out sponge.
Step 5: Tie off the top of the bag.
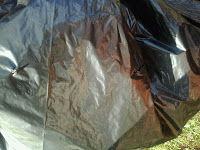
Step 6: Poke the bag 4-5 times around the top of the bag to aerate with scissors.

Step 7: Place the bags somewhere hidden but where they can get good, indirect sunlight.
Step 8: Shake the bags every month or so.
You should have crumbly compost come Spring!
Other things we did today:
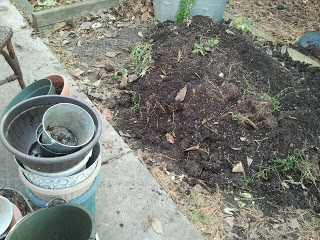
We created a composting “dirt pile”, dumping all our potted annuals with their dirt in one unused area of the yard. We rinsed out the empty pots and stored them under our deck or under a tarp. As we added to our dirt pile, we layered dead leaves and spent green plants between the dirt. We gave it a good mix with a shovel, and the sun and snow will do the rest. Through winter, the material will decompose into the potted soil, and will be ready to fill the pots come Spring.
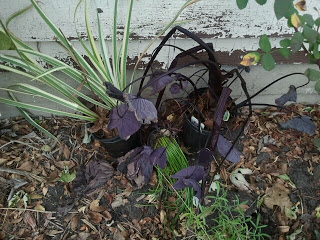
We placed our pond water plants against the garage wall in our sun bed. We then mounded mulch and leaves around it to keep the roots from freezing. I have had some water plants survive this way, and some not. But the tactic here is that the garage wall and the mulch keeps the plants warm and will come back in the Spring. If I can get one or two to come back, it’s still money saved.
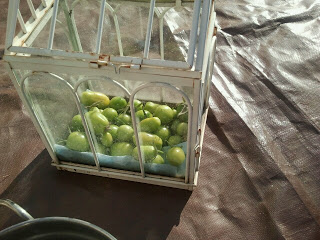
It killed me to rip out the tomato plants, especially when I still had tomatoes on the plants. But I harvested all of fruit and put them in my glass terrarium I used to keep decorative small plants on the deck in the Summer. I placed a napkin on the bottom, and laid the green tomatoes on the bottom. The glass creates a “mini hothouse” and will keep the tomatoes nice and warm so that they hopefully ripen up quickly to eat.
So a productive day in the yard, putting my babies to bed and getting ready for Spring. There was a part of me that got excited for Spring already, and all the growing possibilities it brings. My husband teased me saying, “We haven’t gotten through Winter yet!” But getting the yard ready for Spring got me optimistic about it, and ready to tackle a Midwest Winter.
- Sugar-Free, Low-Carb, Olive Oil Chocolate Hazelnut Tart - February 18, 2023
- Easy Slow Cooker French Onion Soup - November 28, 2022
- Recipe: Chicken Vindaloo with Whole Foods Vindaloo Curry Powder - January 22, 2022