
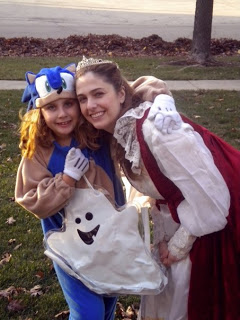

My daughter surprised me with a doozy this Halloween-with wanting to be Sonic the Hedgehog. After searching the Internet for a pre-made costume, I opted to make one. There is no real instruction online on how to make one, so I decided to post how I did it, in case there is someone out there who doesn’t know and has a Sonic lover in their home too.
Now, I do sew, and the approach I am suggesting means having to sew a basic pattern on a sewing machine with some hand sewing as well. If you can’t sew, perhaps you can find some bright blue pajamas or a sweat suit, and cut/glue the rest of the pieces together. The other thing I did buy pre-made online is the above fleece Sonic hat on eBay. Amazon also sells it. If you can’t find it, use a “jester” hat pattern as a base and cut felt to match Sonic’s eyes and nose, and glue it all on there.
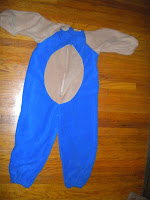
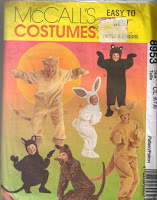
I started with the above McCall’s pattern and used the bunny one as a base, but I used bright blue fleece to make the jumpsuit, with a light brown color for the arm pieces and the tummy. The tummy is not in the pattern, you need to eyeball cutting a half moon shape out of each front panel with the brown, and use a brown zipper in that area to match. I made a Velcro tab on a blue fleece rectangular piece at the top of the jumper to keep the top shut and match the blue on the top. The instructions with the pattern are pretty easy to follow for the jumpsuit.
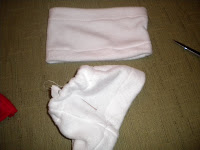
Next, Sonic has big, fluffy “socks” that I quickly made without using any pattern. I just cut two identical rectangles about a foot in width, and 6 inches high. I stitched the ends together to make a “ring, and did a 1/2 inch seam on top and bottom to thread some elastic through. The elastic creates the fluffy sock look and gets pulled on over the jumpsuit by the ankles and stays put.
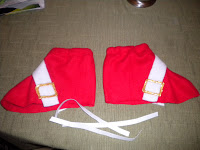
Next, using the splats in the pattern package, I created Sonic’s red gym shoes. I cut 4, 2 inch strips of white about 8 inches long and glued them (using strong fabric glue) on all of the splat pieces (4 total). I sewed the pattern pieces as directed once the glue dried. Then, using gold puffy paint, I “drew” Sonic’s square buckles on the outer side of each splat. Then I hand stitched elastic on the bottom edge of the splats so it bridges across the width of the bottom of a shoe and stays put. Following the pattern directions, the splats also have elastic in the top seam over the ankle.
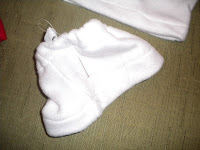
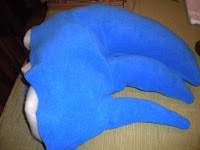
Finally, I hand stitched a pair of gloves with white fleece, and took a sharpie marker to draw three lines over the “knuckles” of the glove. I also eyeballed a sonic “back” (see below) which I stitched together like I would a pillow, and filled it with some poly-fill. I was going to stitch a bottom to this piece, and then put snaps on it as well as snaps on the back of the jumpsuit so that the costume could really be true to SONIC with his spiked back. But my daughter thought the back piece cumbersome, even with the snaps, so I did not finish it. But using snaps might allow your child to take it off or on if its getting in the way of fun!
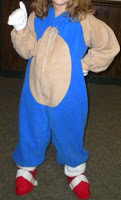
Below is a quick shot of the finished ensemble! Hopefully, next year, my daughter either learns to sew or wants to be something simpler! HA!
Latest posts by Flora Caputo (see all)
- Sugar-Free, Low-Carb, Olive Oil Chocolate Hazelnut Tart - February 18, 2023
- Easy Slow Cooker French Onion Soup - November 28, 2022
- Recipe: Chicken Vindaloo with Whole Foods Vindaloo Curry Powder - January 22, 2022


