A contender-but alas, not a winner. A crumb topping apple pie was crowned the winner of my parish’s apple pie contest. But I gave it a good college try with this recipe. I still had rave reviews (and was a top seller at the auction as well…go figure). SO, if you want a good, punchy, apple pie recipe this fall with a unique twist to a typical butter crust, this is it!
Also, make note that after MUCH research (most of which was contradictory) I chose to use an even combo of Granny Smith and Macintosh apples based on Cook’s Illustrated thorough research of the topic. These are apples found easily enough at the stores, and have a nice combo of tart versus sweet. The Granny Smith apple keeps its shape and has a citrus, tart quality while the Macintosh apple is sweeter and breaks down more in the pie, adding to a more juicy apple-sauce texture. Because of the contradictory information out there in the blogoshpere, I am going to conduct an apple cooking experiment with some fellow, “foodie” taste testers. We are going to try a variety of apples in small tartlet pans with a simple butter crust. Then we will post the findings with pictures, and hopefully get some consensus on the best apples for pie!
Baking Contest Apple Pie with Almond Crust
Crust:
2 3/4 cup flour
7 oz. almond paste, coarsely crumbled
1/2 tsp. salt
1 stick butter, very cold
5 Tbsp. butter flavor Crisco, very cold
3-5 Tbsp. apple nectar, very cold
1/2 tsp. almond extract
1 1/2 tsp. apple cider vinegar
Filling:
3 to 3 1/2 lbs. baking apples (about 8-9 cups, 1/4 inch sliced)
1 Tbsp. lemon juice
2 Tbsp. apple nectar
1/4 cup packed brown sugar
1/4 cup granulated sugar
1 1/2 tsp. ground cinnamon
1/4 tsp. freshly grated nutmeg
1/4 tsp. salt
2 Tbsp. butter
1 Tbsp. plus 1 tsp. cornstarch
Finish:
1 egg, beaten
1 Tbsp. granulated sugar
First, make your crust. Pulse flour, almond paste and salt in a food processor until finely ground. Add cut up butter and shortening, pulsing until mixture resembles coarse meal. In a small bowl, mix 3 Tbsp of the apple nectar, almond extract and cider vinegar. Add to the dry mixture, pulsing until dough begins to clump. If you need more moisture, add more nectar by the Tbsp until you can hold the dough together by pressing between your fingers.
Lay out two sheets of saran wrap on a work surface. Pour dough in even piles on each plastic sheet. Using the plastic, fold the dough inward and press. Use the plastic and your hands to create a ball. Cover the ball completely with the plastic and use your hands to shape it into a flat disc. I use plastic wrap versus flour to keep the crust from getting tough and melting the butter with the heat of your hands. Place both discs in the refrigerator for at least 30 minutes to let the gluten relax.
Meanwhile, prepare your apples. In a very large bowl, toss prepared apples with both sugars, apple nectar, lemon juice, cinnamon and nutmeg. Let sit for 1 hour to macerate.
Preparing the apples probably took the needed time for your dough to chill. So take your bottom crust dough and unwrap it. Roll out your dough between plastic wrap until it is roughly an inch bigger than your pan. Peel top plastic, and using your bottom plastic, place pan inverted on top, and flip crust over onto the pan. Now peel the bottom layer of plastic off what is now the top of your dough, and gently shape the dough inside your pan. Cut any severe overhang so you are about 1/2 inch or so all the way around the edge. (I save access dough for decoration in the fridge for later) Prick bottom and sides with the tines of a fork, cover with plastic wrap and chill for 30 minutes more.
Now back to the apples. Drain the apples in a fine sieve, capturing all the juices in a bowl. Transfer juices into a nonstick saucepan and add 2 Tbsp. butter. Cook on medium until you have reduced it to about a third of a cup of caramelized juices. Transfer the drained apples back into the bowl and toss with cornstarch until dissolved. When your caramelized juice is ready, go ahead and pour it back with the apples and toss. Set aside.
Before final assembly, turn your oven to 425˚ and move your rack to the lowest position. Get a flat, non-insulated baking sheet and put it on that rack. This acts as a “baking stone”. Heat the sheet to 425˚ for at least 20 minutes. You may want to put some tinfoil on the oven floor to catch juices.
So while your oven is getting it’s groove on, get assembling! Pull out your bottom crust and pile your apples as high as you can get them in there. Apples lose their moisture and flatten out during cooking, so pile them in there and make sure you have thin, 1/4 inch slices so there is little air between the apples. Roll out your second crust, same as the first with plastic wrap, and flop over on top of the apples. Now if I am making decorative steam holes like the above picture, I make them while the dough is flat and before I flop it over on the apples. Once the dough is centered and even on top, I then crimp the top crust under the bottom crust all the way around, making a nice seal. Then I go around again using my fingers to make an even, crimped edging to make it pretty.
Now if you are feeling “OCD“, put the filled pie in the fridge for an hour. Again, this relaxes the dough so there is less shrinkage and distortion with your pie. But if its a late night and you are tired, just let her go and get cooking. Before baking, brush the top with the beaten egg and sprinkle with sugar for a finishing touch. Then, place the pie directly on that hot baking sheet. Cook the pie for 45-55 minutes. Keep a close eye on this crust. Using vegetable shortening in this dough will allow the crust to brown quicker, so have tinfoil on hand to cover the edges thirty minutes or so into baking. If you find that things are browning but the apples are not bubbling and still tough and it’s 40 minutes into baking, “tent” the pie and check it every ten minutes. When you get some nice bubbling and sizzling and the apples are soft but still shaped, the pie is done. Take the pie out to cool for at least 4 hours or overnight before serving. Enjoy with some ice cream! Yum!
* Note-depending on your oven, you may want to have your oven at 400˚ v.s. 425˚ for this crust because of how fast it browns. If your oven gets pretty hot, I would do this and still follow the foil/tenting instructions above.
Flora is an award-winning creative director in Chicago turned food and lifestyle blogger extraordinaire. She is also author to the popular BEE NATIVE! gardening book series and various children's books that celebrate the wonder and hard work of bees and butterflies. Her blog and social spaces inspire thousands to create, learn, cook, grow, and craft, making their world lovelier one pixel/petal/seed/bite/stitch/brushstroke at a time. Follow her on all the social spaces, YouTube, and Amazon, and get creative!
Latest posts by Flora Caputo (see all)
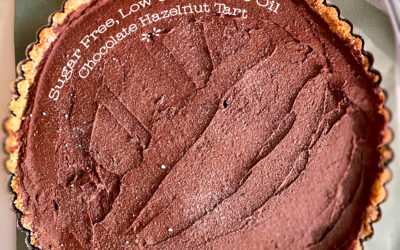
- Sugar-Free, Low-Carb, Olive Oil Chocolate Hazelnut Tart - February 18, 2023
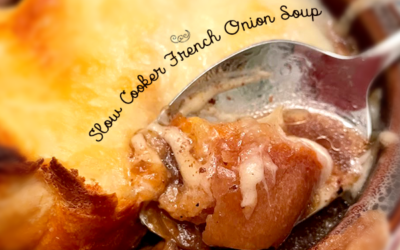
- Easy Slow Cooker French Onion Soup - November 28, 2022
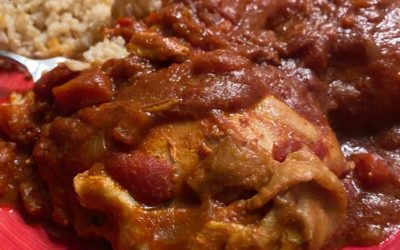
- Recipe: Chicken Vindaloo with Whole Foods Vindaloo Curry Powder - January 22, 2022