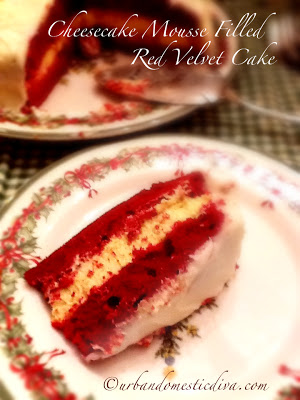
Over the holidays, we did a lot of entertaining, which means we had a lot of food. I just felt like we were always eating. If it wasn’t dinner, it was leftovers from dinner. And the worst?/best?/worst? thing is when we had left over dessert. So when our close friends came over for a holiday dinner, I wanted to make a cake that was the perfect size for our little group. I also wanted to make it very holiday-esque, so I went with red velvet to start. Then I thought about the cream cheese frosting I always make, and then thought about the delicious cheesecake mousse I always order in my cakes at Costco. From there, I became inspired to make a mousse filling for this little cutie to compliment the frosting.
I made it the perfect size by simply making one 9 inch round cake, and cutting it in half to fill it. It was a sweet little thing, and we only had leftovers for one other evening for a small treat. Perfect!
If you need some decoration hints to make it very festive, cut candied red cherries in half for holly berries, and pair them up with flattened green fruit roll ups cut to look like holly leaves. I wanted the main picture to be a little more generic, because red velvet cake is yummy any time of year. So I am not showing these decorations, but it made the cake very colorful.
I hope you enjoyed the holidays this year. As for me, I am going on South Beach for a little while! Too much good eating!
Cheesecake Mousse Filled Red Velvet Cake
Ingredients:
Cake:
1 1/8 cup all-purpose flour
1/2 tsp. salt
3/4 cup sugar
1/2 stick of butter, softened
1 egg
1 oz. red food coloring (don’t skimp)
1 heaping Tbsp. unsweetened cocoa powder
1/2 cup buttermilk
1/2 tsp. vanilla extract
1/2 Tbsp. white vinegar
1/2 tsp. baking soda
Cream Cheese Frosting:
4 oz. cream cheese, softened at room temp.
1/8 cup butter, softened
1 tsp. vanilla
2 cups powdered sugar
1 tsp. milk
Mousse Filling (adapted from recipelink.com)
1/8 cup water
1/2 tsp. Knox unflavored gelatin
1/2 box instant french vanilla pudding or cheescake flavored pudding
1/2 envelope Dream Whip
1 cup whipping cream
2 oz. softened cream cheese
1 tsp. vanilla extract
Directions:
Preheat oven to 350˚. Use baking spray and a piece of parchment cut to a 9″ round. Spray a 9″ cake pan, and lay the parchment on the bottom. Set aside. In a bowl, mix flour and salt, set aside.
In a large bowl, use your electric mixer to cream the butter and sugar until light and fluffy. Add the egg and beat well.
In a glass bowl, mix the red food coloring with the cocoa until well combined. Add the buttermilk to the food coloring mixture and mix. Set aside.
Back to your batter, add the buttermilk mixture alternately with the flour mixture to the butter. Be careful not to over mix. I stop the mixer often and use a spatula to work the sides in as I add the ingredients-over mixing can toughen your cake. After the batter is smooth and combined, take the bowl off the mixer, and stir in the vanilla with a spatula. In a small bowl, add baking soda and vinegar. This will foam. Stir vinegar mixture into batter, careful not to over mix.
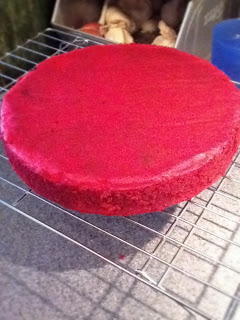
Pour batter into your prepared pan and bake on the middle rack for 25-30 minutes, or until wooden toothpick come out clean. Cool cake on a wire rack for ten minutes, then invert it out on the rack to cool completely. Once cooled, use a serrated knife to cut the cake horizontally in half.
Meanwhile, make the filling. In a small saucepan pour the water, and sprinkle the gelatin over it. Let sit and soften for one minute. Gently heat the gelatin over medium heat until the mixture thins out and the gelatin is dissolved. Don’t let it boil. Remove from heat and let it cool down, but not longer than 10 minutes.
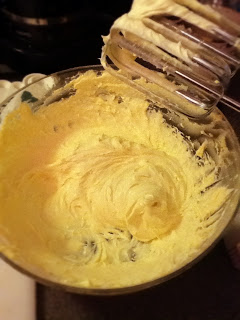
While that’s cooling, pour powdered pudding and powdered Dream Whip into a medium bowl. Pour in the cream and mix on low speed until well combined. Beat for a few minutes on high until light and creamy, scraping the sides as you go. Mix in softened cream cheese and vanilla and beat for a minute until just combined. Next add your cooled gelatin, and whip for one minute. Let filling sit in refrigerator for about 30 minutes to one hour. If you are making this a day before, you may need to whip up the filling with a mixer before filling your cake to get it light and loose. Fill the middle of the cake, and set it on your serving platter to frost.
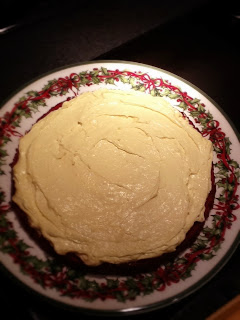
Next, make the frosting. This can be done a day ahead and tightly stored in the refrigerator until ready to use. Whip cream cheese and butter together until light and fluffy. Add vanilla and continue beating. Turn mixer to low and add powdered sugar by first adding 2 cups and mixing. Then add milk, and then add the rest of the powdered sugar. When sugar is all combined, beat on high again to get a lot of air and lightness into the frosting for a couple of minutes.
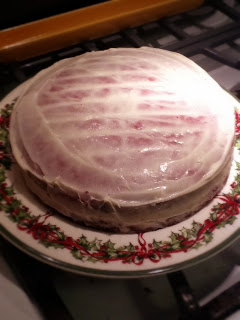
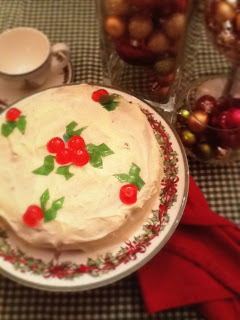
Frost your cake, first with a thin crumb layer, then with big, fluffy swirls. Above are the holiday decorations I mentioned in the intro.
- Sugar-Free, Low-Carb, Olive Oil Chocolate Hazelnut Tart - February 18, 2023
- Easy Slow Cooker French Onion Soup - November 28, 2022
- Recipe: Chicken Vindaloo with Whole Foods Vindaloo Curry Powder - January 22, 2022
