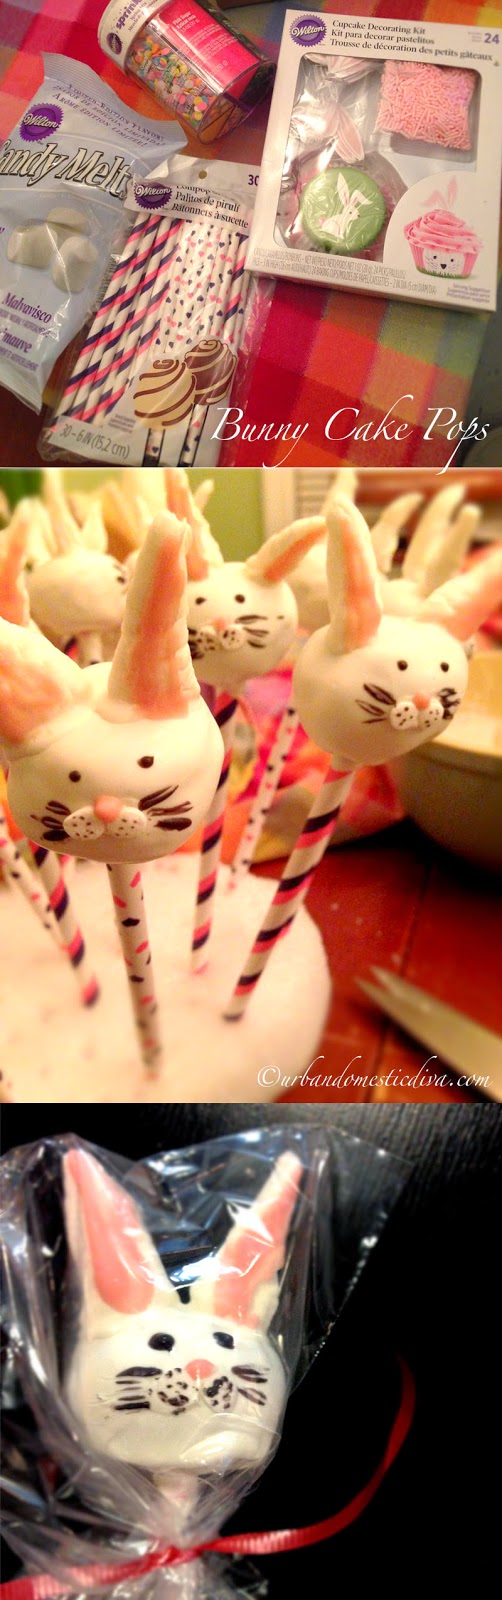
Prepping for the big day Sunday continues, and guess what I stayed up late (err, like until 1:30 a.m.) doing last night? Decorating these adorable bunny cake pops, and wrapping them in plastic baggies so they stay fresh and perfect for Sunday bunny hunters!
Now, I could not have made these lovelies without my good friends at Wilton. So I must give them a shout out. I have loved their products forever and a day. After visiting their booth at the Housewares Show (where I gushed, oohed and ahhed at all their stuff), we have been in touch, sharing ideas on projects and tips. How cool is that?

They provided me with some new and groovy lollipop sticks that have some really fun designs on them. They actually will help my guests tell the difference between chocolate and vanilla. But I was pretty impressed with these sticks for a couple reasons. One, they are very light weight, which helps prevent the stick from going right through the cake pop as you decorate it (this happens on occasion with the skinnier, thicker sticks). The second reason is they are hollow- like a straw. This may not seem like a big deal, but physics come into play here. The weight of the cake pop gets evenly distributed on a wider surface area, and some of the cake gets pushed into the middle of the stick, helping it stay on better. SO as I covered and decorated my pops, things went a lot smoother. I think I only lost one pop, versus the usual two or three. You can still get these groovy pop sticks at Joanne’s and Michaels.
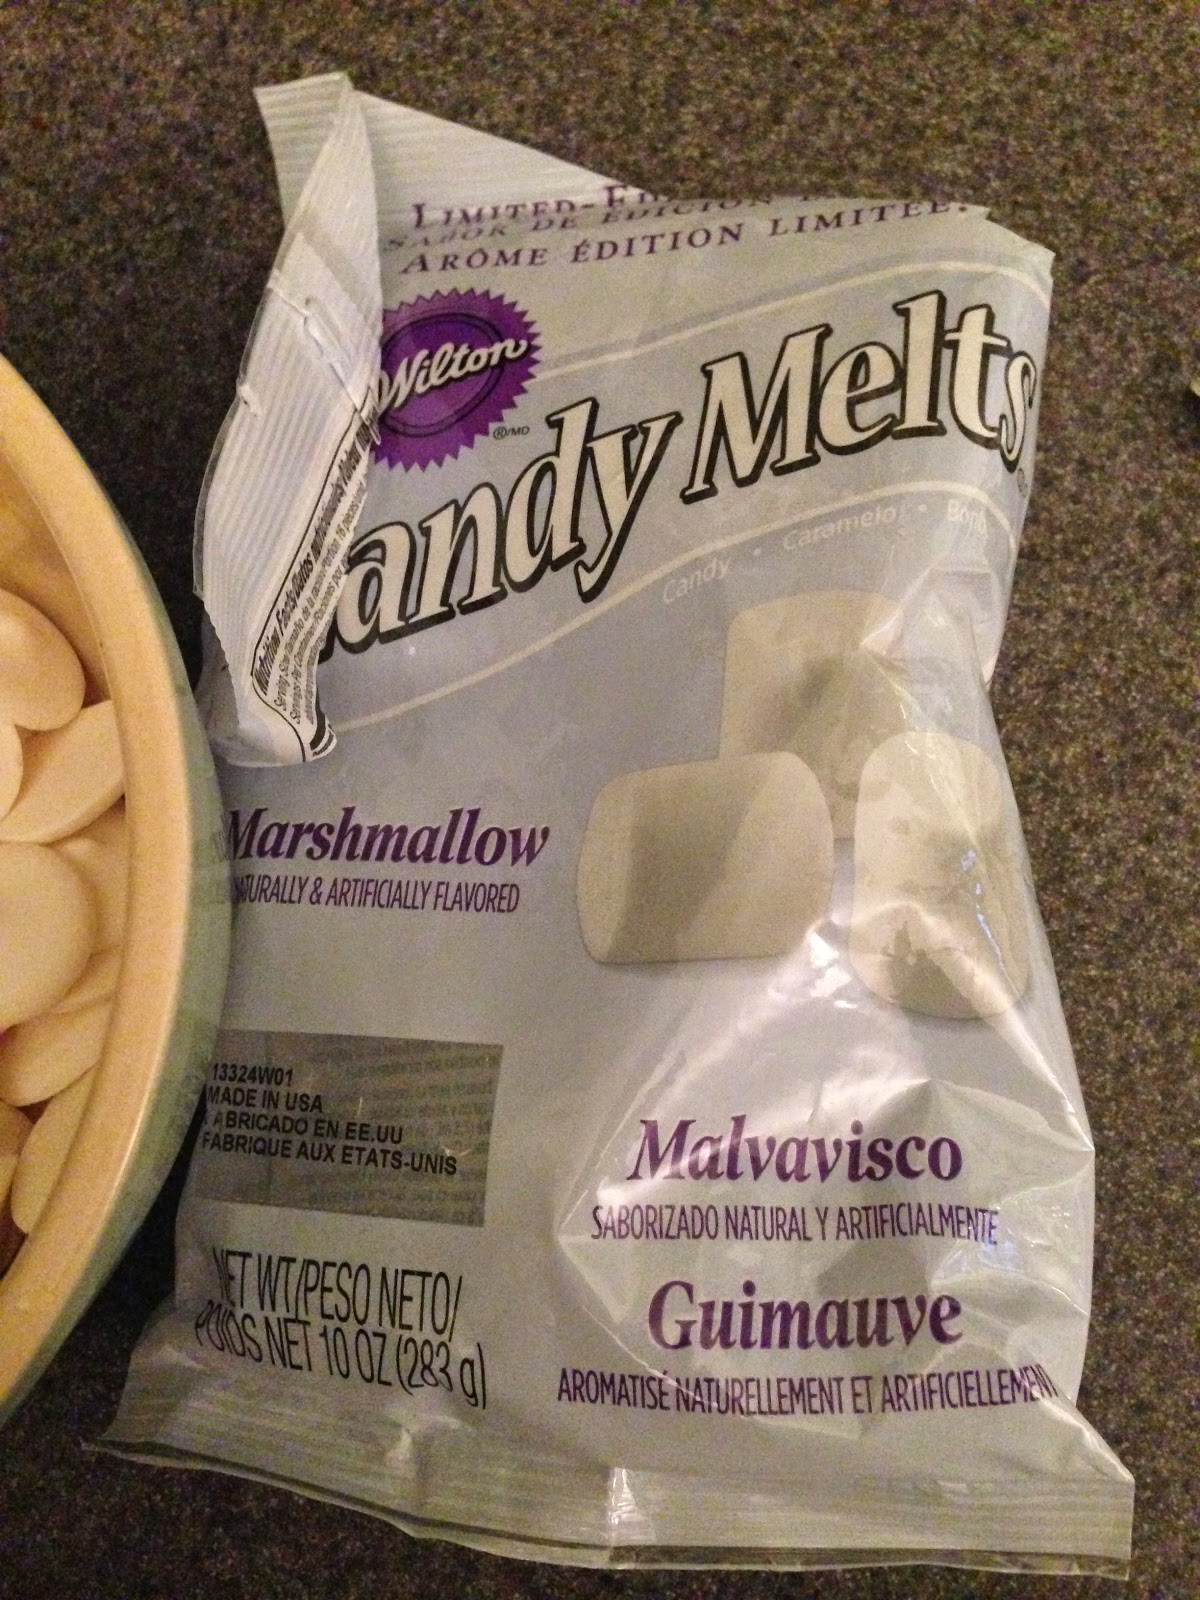
Now, cake pop decorating can take on many things. But my favorite thing to cover cake pops with are Candy Melts by Wilton. I have been using these magical discs of delight for years. But recently Wilton started creating seasonal flavors, and for spring they created lime flavored ones and marshmallow ones. They were generous enough to send me some marshmallow ones to play with, and they worked out great (not to mention, licking my fingers after decorating was extremely delightful). They also sent me some spring colored sprinkles and confetti. The confetti helped make the jowls of the bunnies, and I had some pink and black Candy Melts from my own trip to the craft shop for accents and details, so I was all set to go.
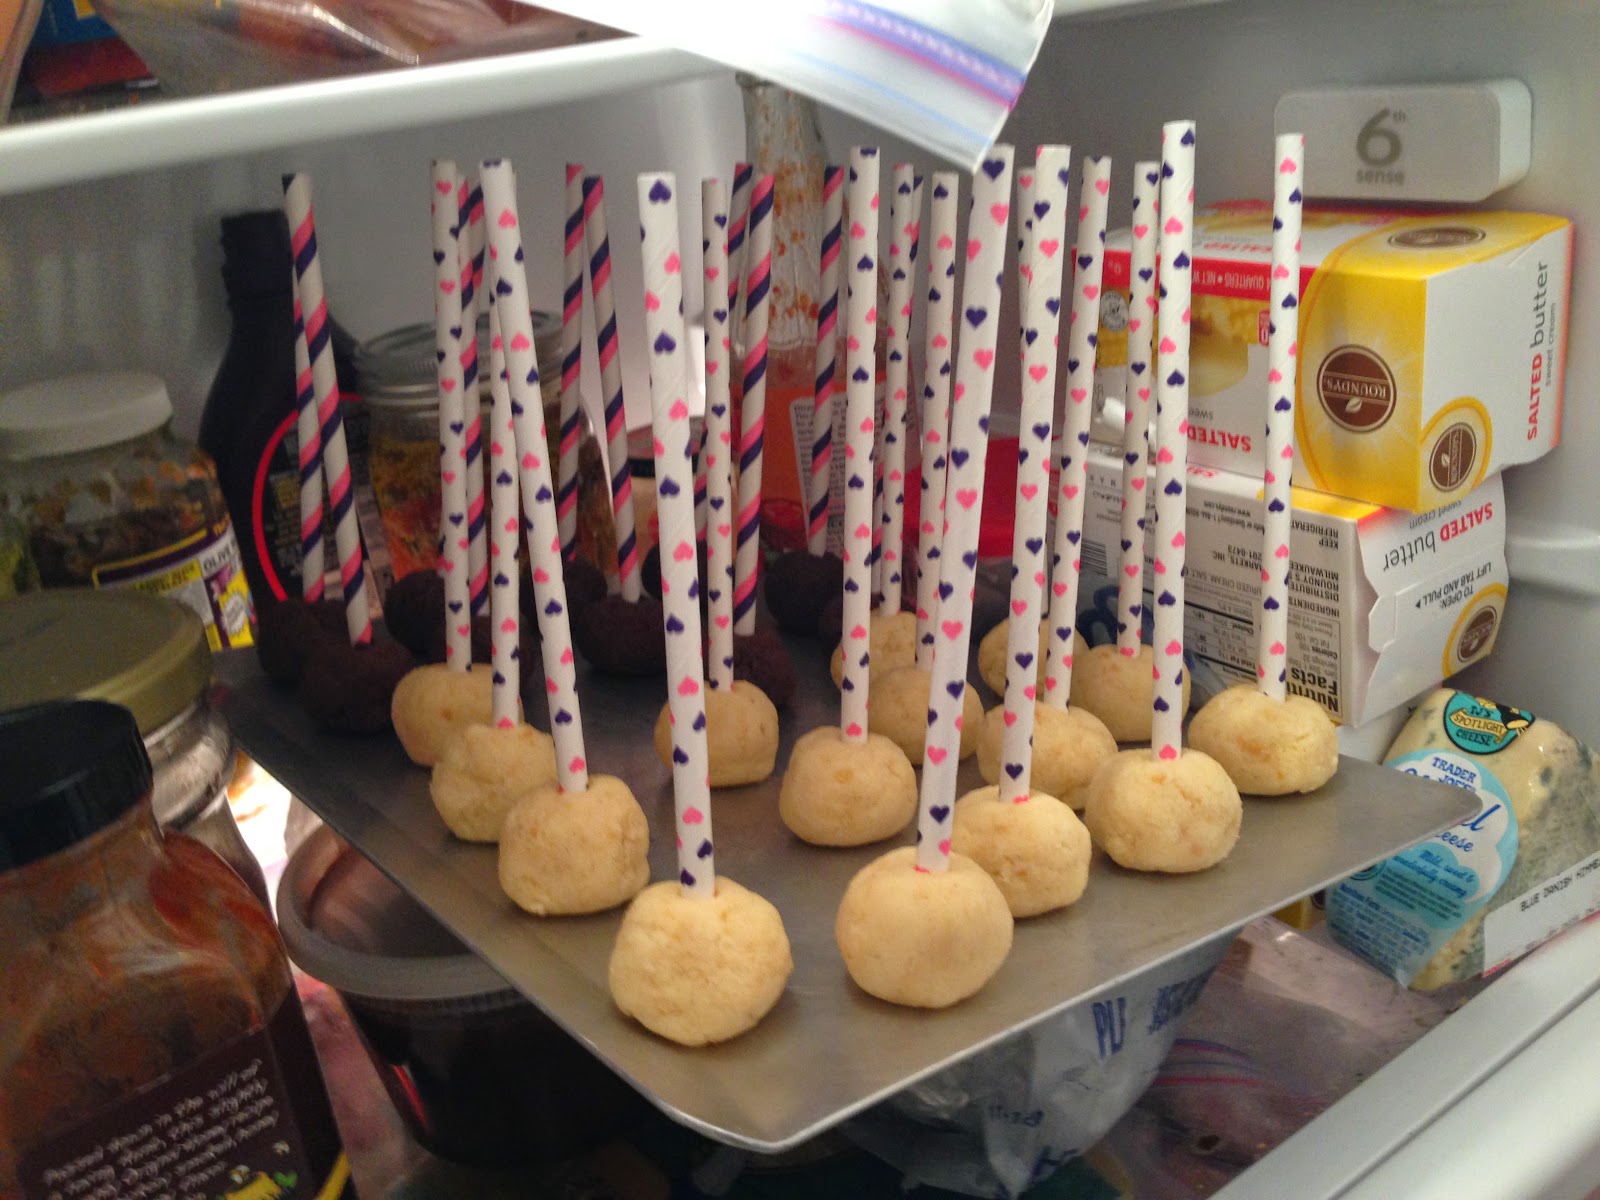
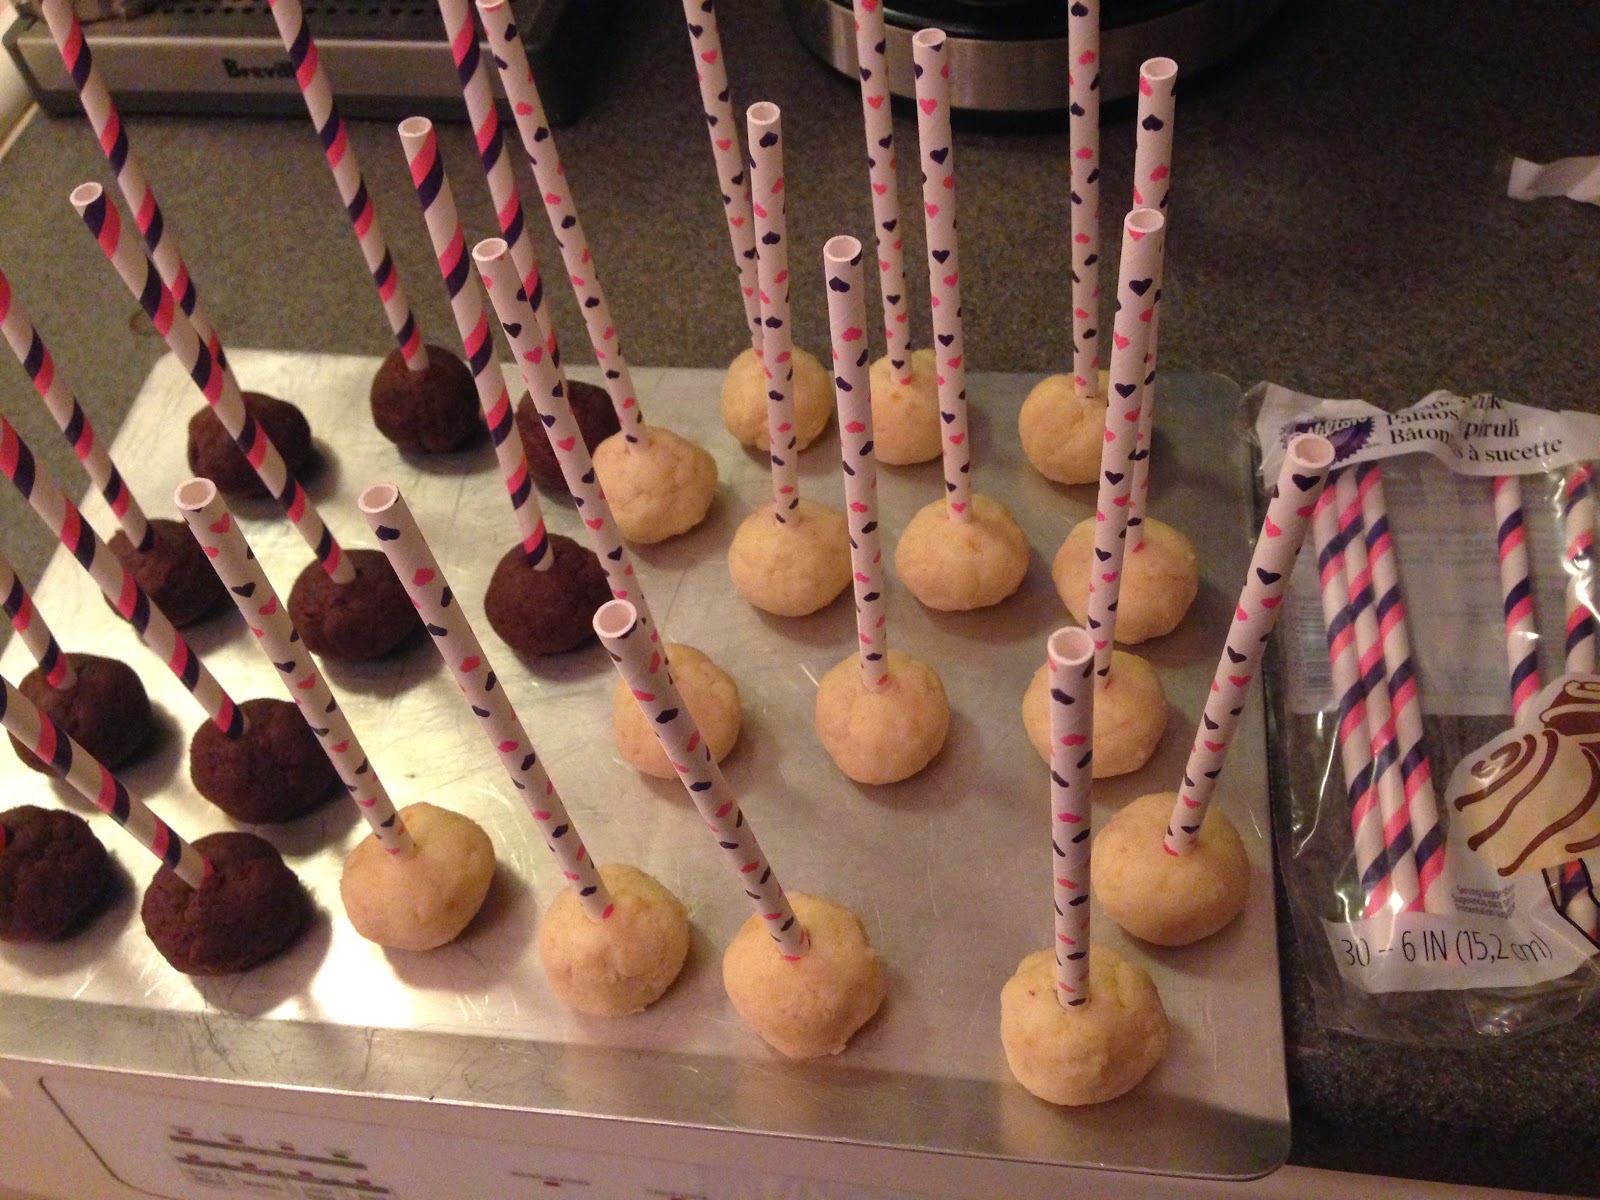
These go quicker of you have cake waiting for you, which I did. I defrosted stored, frozen cake, crumbled up the cake into a fine crumb, mixed it with 1/4 cup to a 1/2 cup store bought cream cheese vanilla frosting to make a “dough”. I then shaped my balls into walnut sizes, stuck the sticks in, placed them on a cookie sheet and chilled them for about an hour in the fridge.
For the bunny decorating you will need:
6-8 large marshmallows, slightly stale
Kitchen shears
Candy Melts in White (Marshmallow is yummy), Pink and Black
Canola oil to loosen the Candy Melts for easier dipping
tooth pick or fine food-grade decorating paint brush
Decorating confetti, picking out the white ones
Styrofoam with holes in it

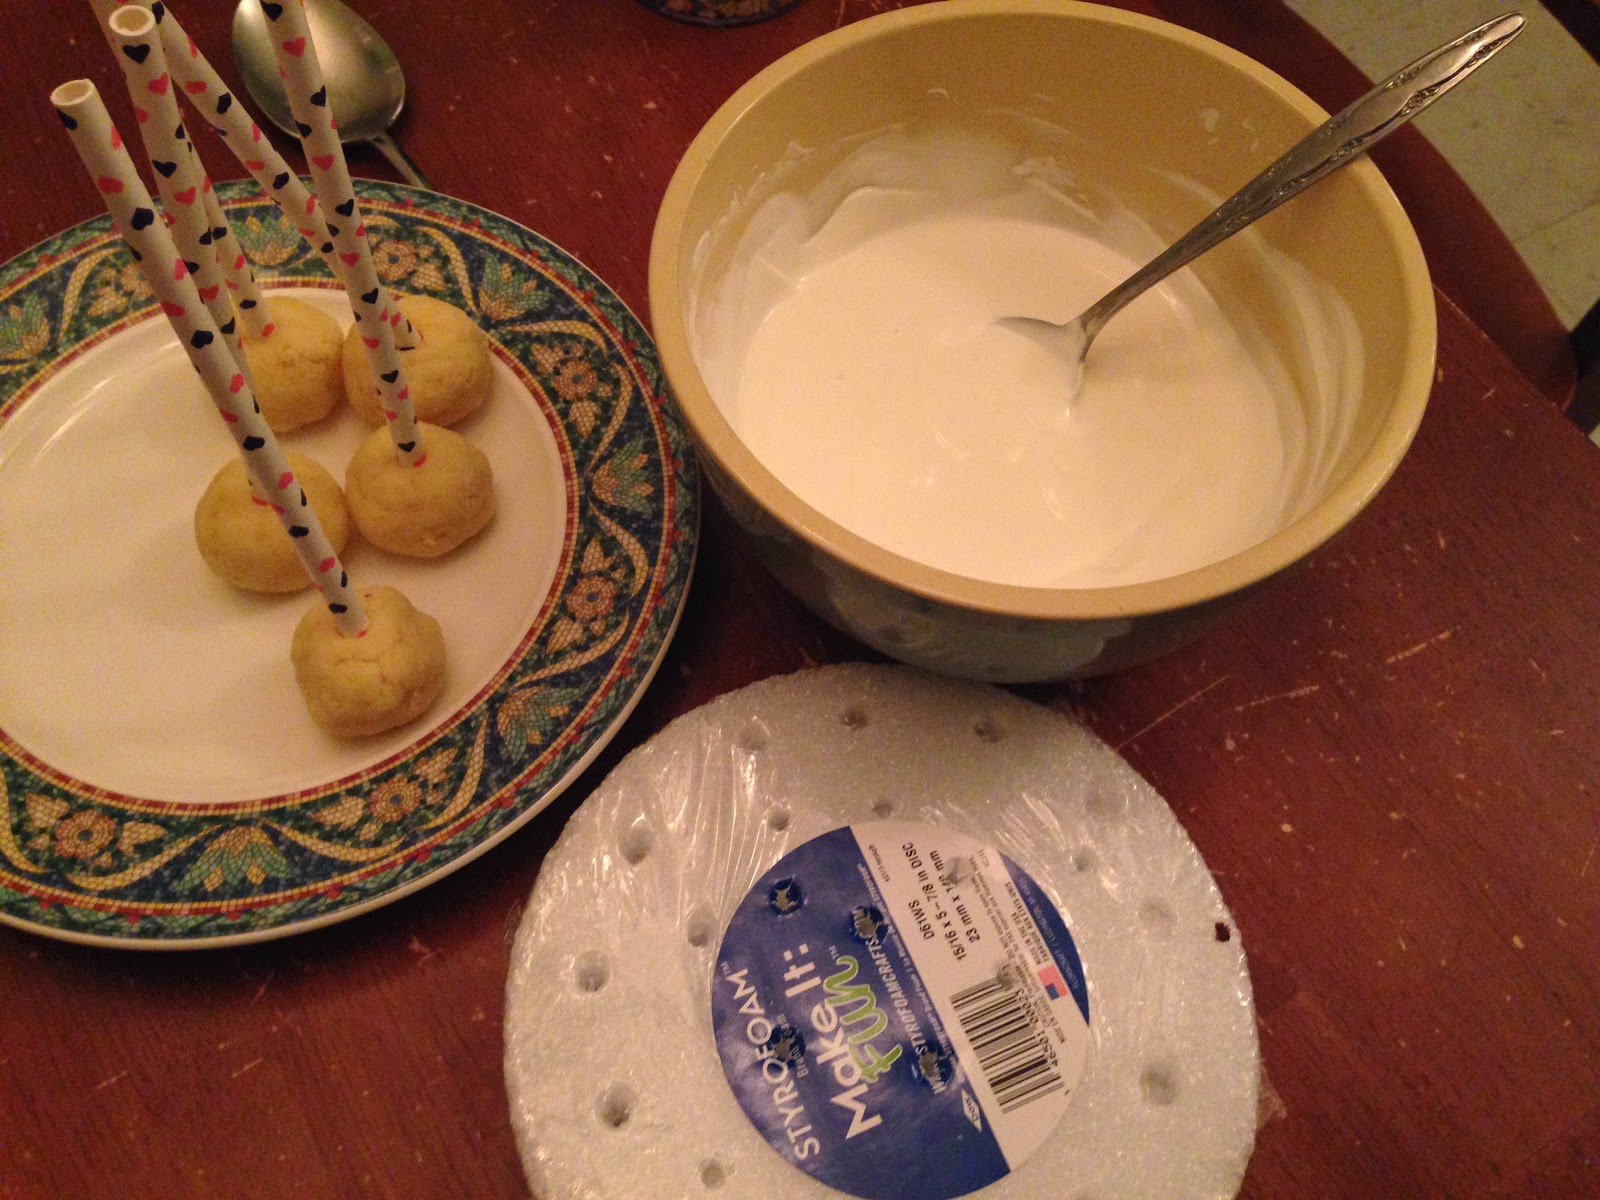

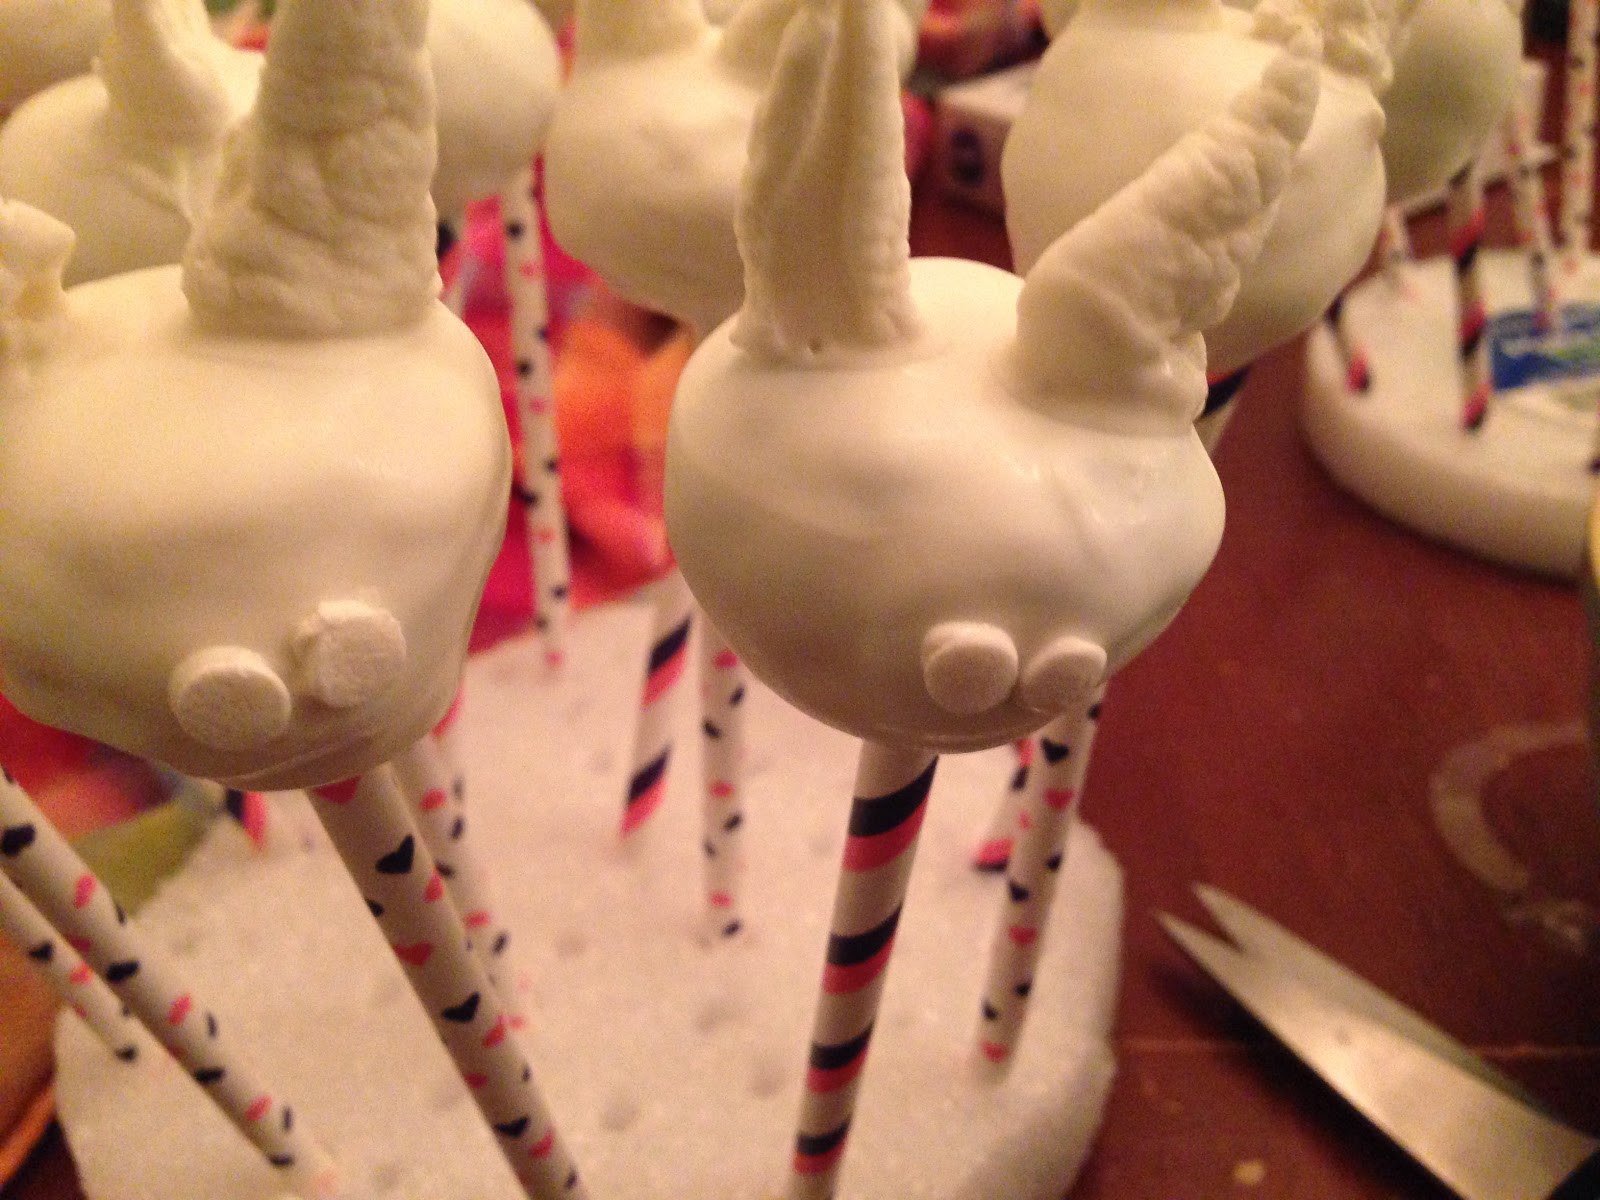
1: Melt the white Candy Melts according to package directions. Loosen with a tablespoon of oil. Take a few cake pops out of the fridge at a time, and dip each evenly in the candy. Let drain off, turning and twirling off access as you go, using the back of a spoon to help cover evenly. Carefully turn them upright and place in the styrofoam to dry. Continue with all pops.


2: Now place the ears. Using kitchen shears, cut ears out of a marshmallow, I cut on an angle pieces of marshmallow, like small triangles. EVen out the bottoms, and shorten them if need be. Use the white Candy Melt as “glue”. Dip each ear end into the candy and set on top of each head. Hold for a minute until it is set. Continue until all ears are on.
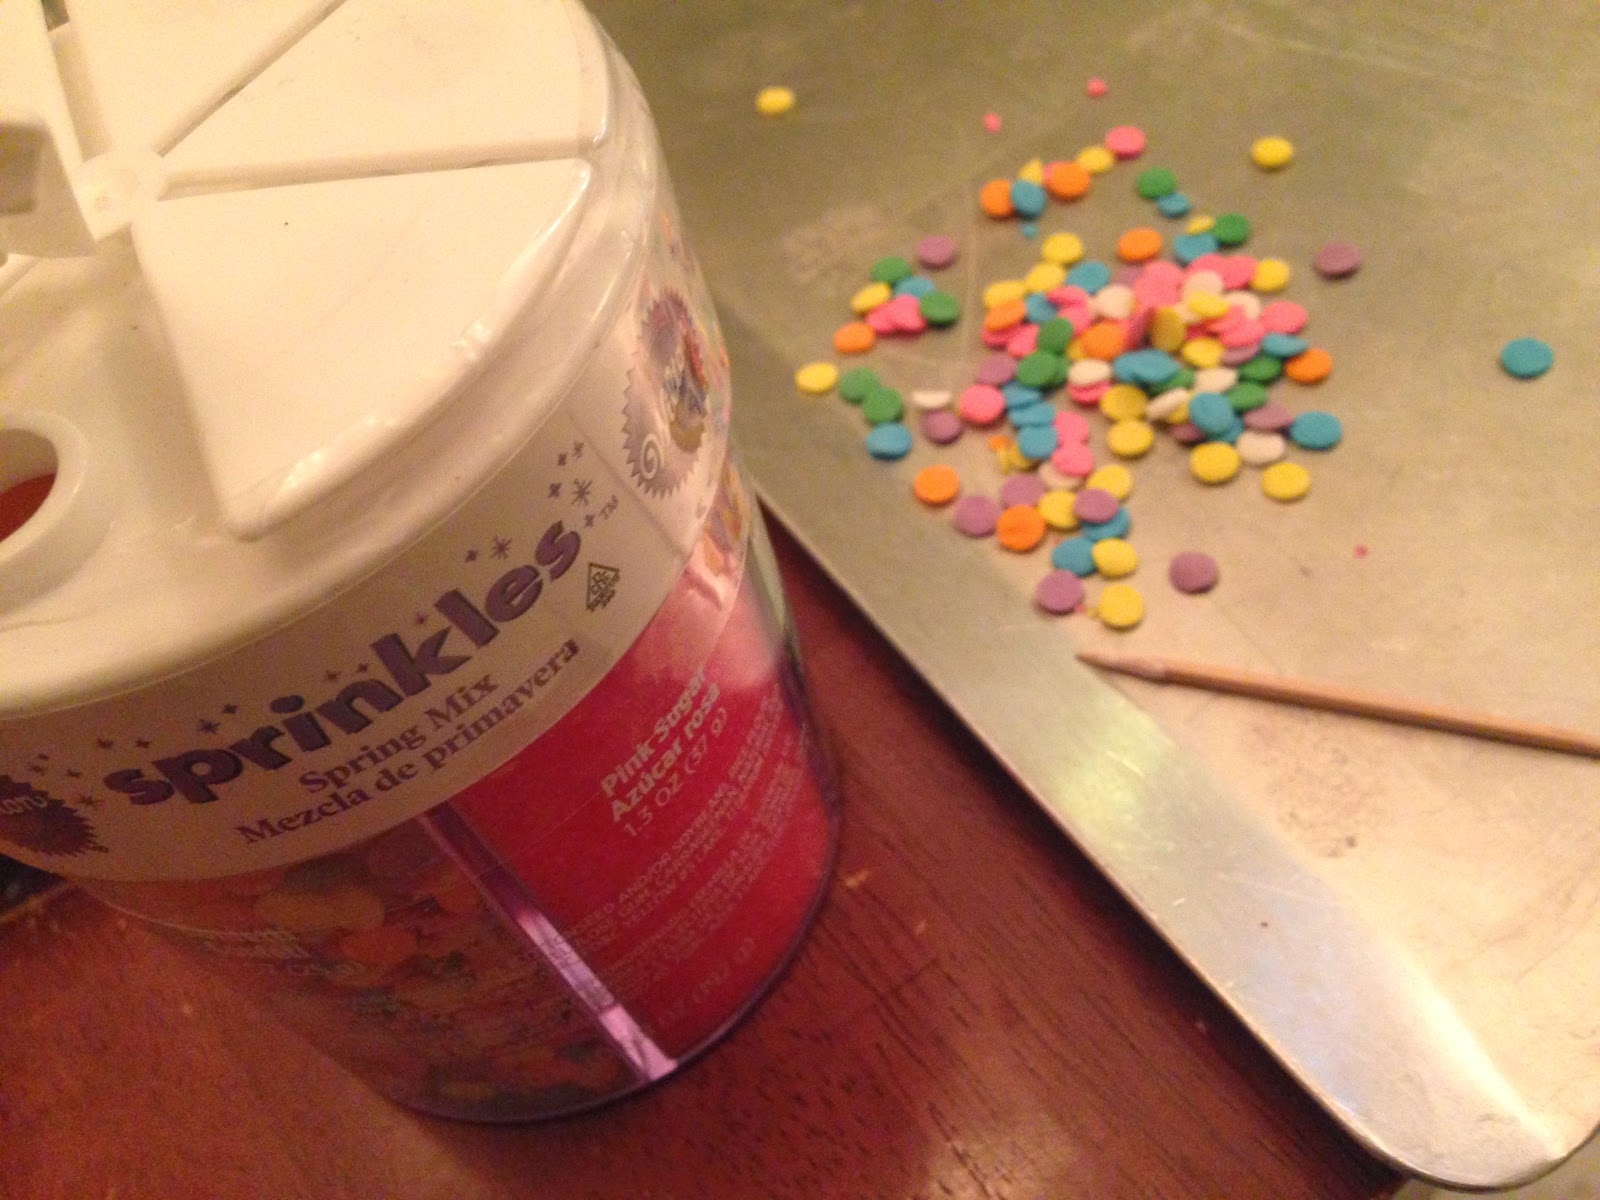
3: Next, while your white candy is still melty, use it as “glue” as you place the white confetti circles, two at a time, at the middle of each bunny face. Have them touch, side by side.

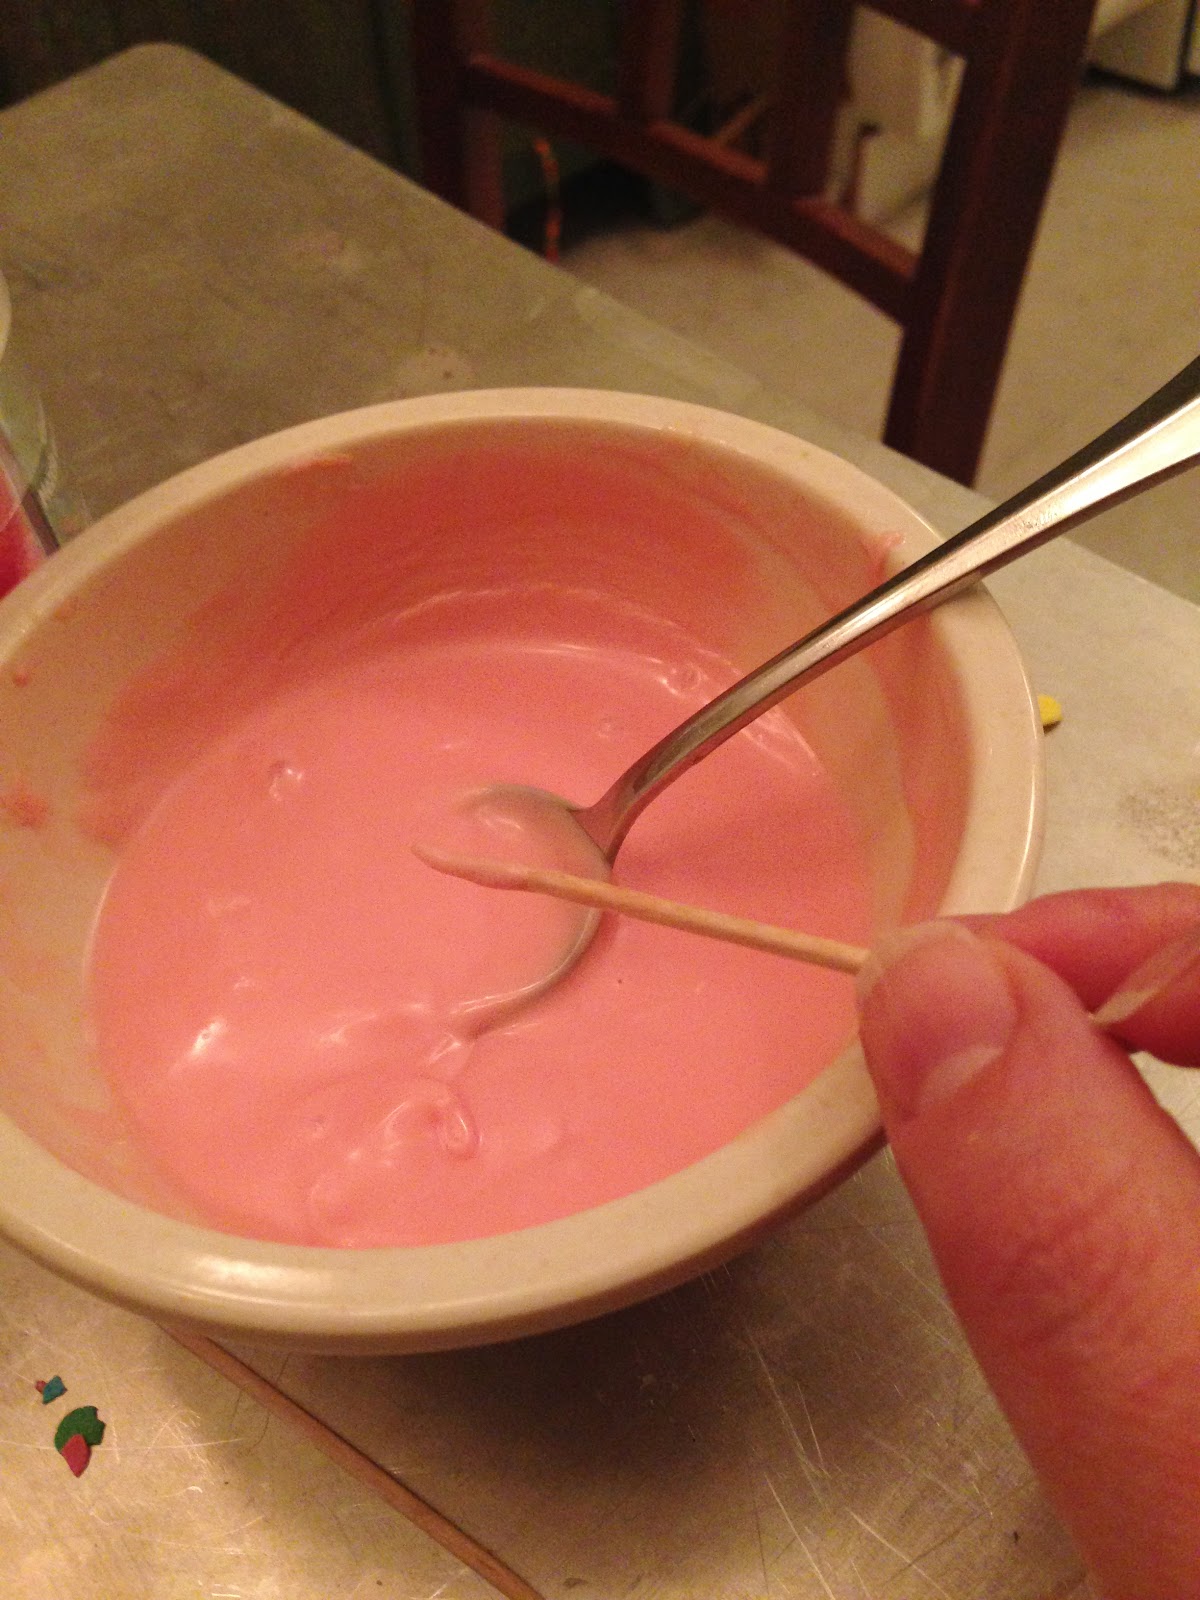
4: While all that is drying, melt the pink Candy Melts. Using a toothpick or brush, place a dot on top and center of the white circles as a nose. Then color in the white marshmallow ears with pink. Let dry.
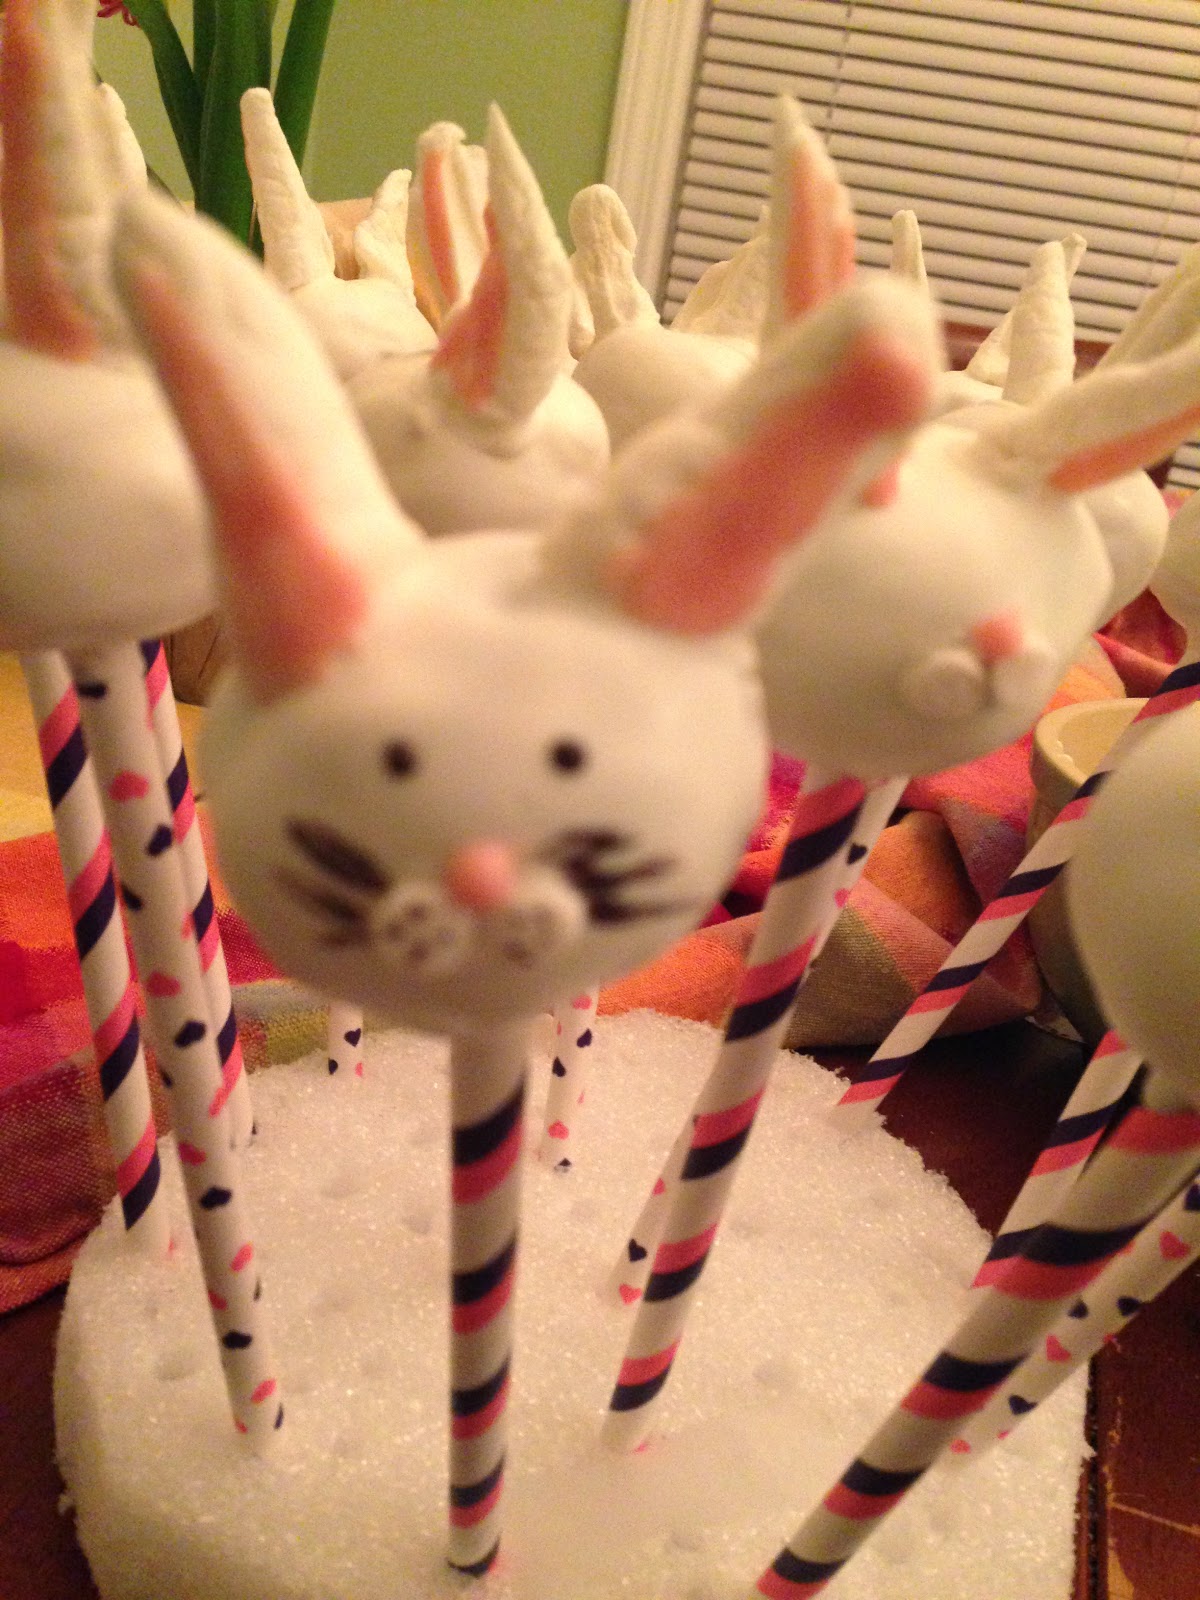
5: Now, melt a little bit of black. Using a toothpick or brush, paint little dots on the “jowls”, whiskers, and little dots for eyes.
6: That’s it! I use generic roll-fold sandwich bags and curling ribbon to cover and tie-up each bunny pop. Come Sunday, I am going to use styrofoam in some cute vintage bowls to serve these cuties in.
Tomorrow for prep day 3, we will be doing more decorating crafts and arguing with my daughter about a replacement Easter dress. Don’t ask. Long story.
- Sugar-Free, Low-Carb, Olive Oil Chocolate Hazelnut Tart - February 18, 2023
- Easy Slow Cooker French Onion Soup - November 28, 2022
- Recipe: Chicken Vindaloo with Whole Foods Vindaloo Curry Powder - January 22, 2022